반응형
[결제연동] 일반결제
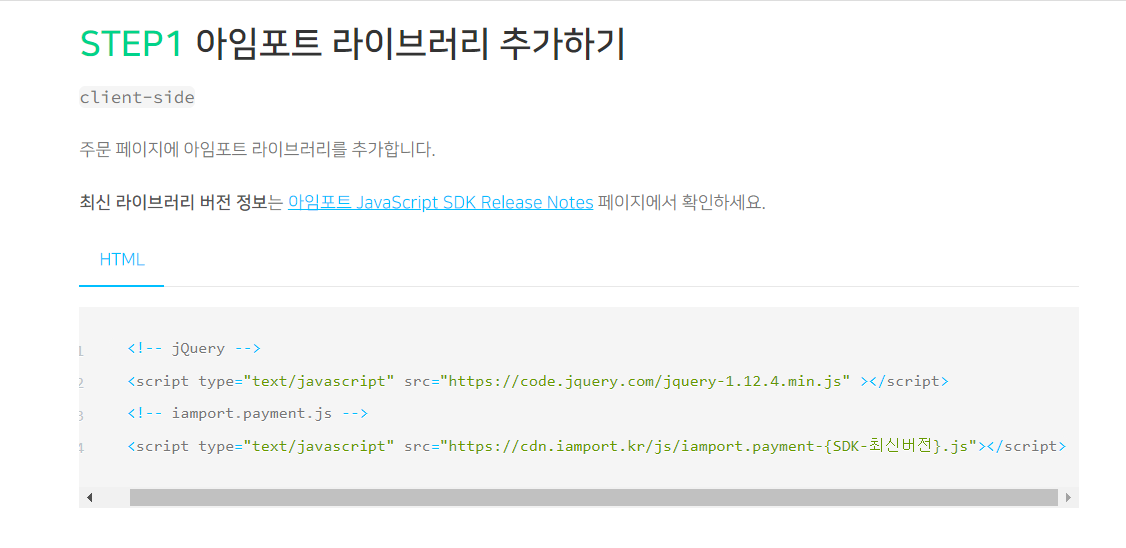
일반결제 연동하기 이 문서는 일반 결제 기능을 구현하는 방법을 설명합니다. STEP1아임포트 라이브러리 추가하기 client-side 주문 페이지에 아임포트 라이브러리를 추가합니다.최신 라이브러리
docs.iamport.kr
- 1. 아임포트 라이브러리 추가
 useEffect(() => {
    const jquery = document.createElement("script");
    jquery.src = "https://code.jquery.com/jquery-1.12.4.min.js";
    const iamport = document.createElement("script");
    iamport.src = "https://cdn.iamport.kr/js/iamport.payment-1.1.7.js";
    document.head.appendChild(jquery);
    document.head.appendChild(iamport);
    return () => {
      document.head.removeChild(jquery);
      document.head.removeChild(iamport);
    }
  }, []);
- 2 . 결제 준비
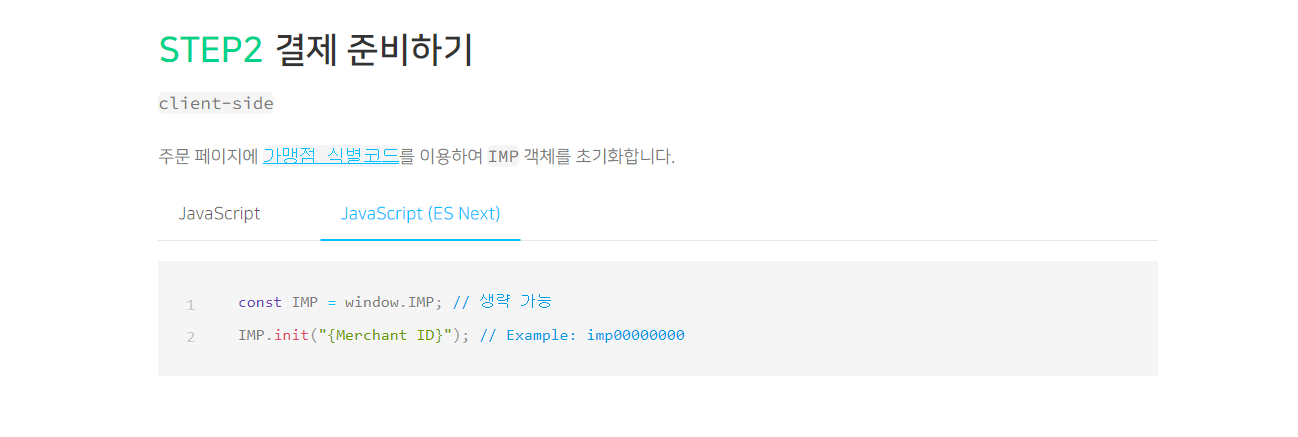
const { IMP } = window;
서버에서 요청해서 가져오기 id값은 properties에 설정
const response = await axios.get(URL,{});
IMP.init(response.data.data); // 가맹점 식별코드

//서버에서 가져오는게 귀찮으면 그냥 이런식으로 먼저 테스트
IMP.init("imp123456789");
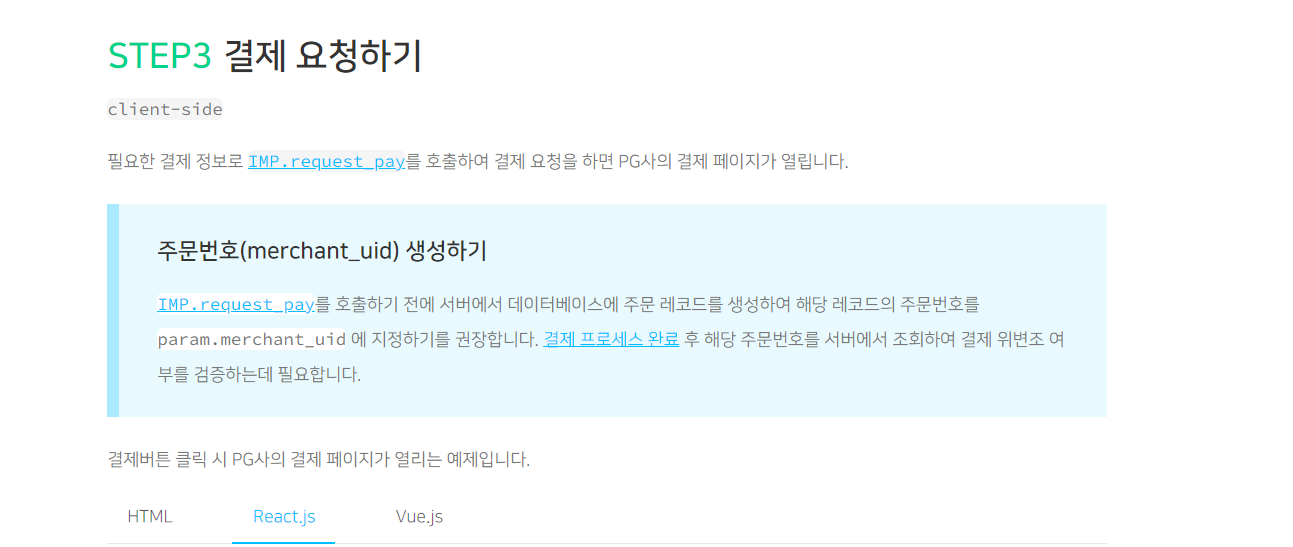
- 3. 결제 요청
- 전체 코드
import React, { useEffect } from 'react';
import axios from "../../../api/axios";
const URL = "/test";
const Payment = (effect, deps) => {
useEffect(() => {
const jquery = document.createElement("script");
jquery.src = "https://code.jquery.com/jquery-1.12.4.min.js";
const iamport = document.createElement("script");
iamport.src = "https://cdn.iamport.kr/js/iamport.payment-1.1.7.js";
document.head.appendChild(jquery);
document.head.appendChild(iamport);
return () => {
document.head.removeChild(jquery);
document.head.removeChild(iamport);
}
}, []);
const onClickPayment = async () => {
const { IMP } = window;
const response = await axios.get(URL,{});
IMP.init(response.data.data); // 가맹점 식별코드
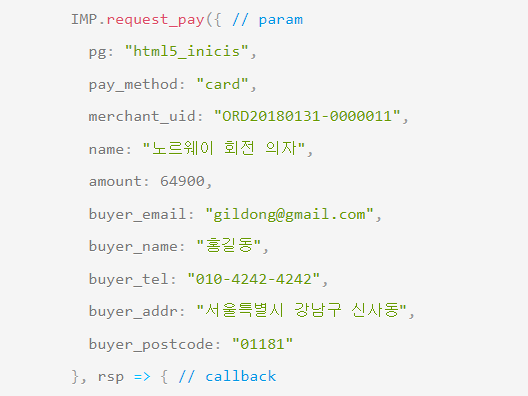
// 결제 데이터 정의
const data = {
pg: "html5_inicis",
pay_method: "card",
merchant_uid: "ORD20180131-0000011",
name: "노르웨이 회전 의자",
amount: 64900,
buyer_email: "gildong@gmail.com",
buyer_name: "홍길동",
buyer_tel: "010-4242-4242",
buyer_addr: "서울특별시 강남구 신사동",
buyer_postcode: "01181"
};
IMP.request_pay(data, callback);
}
const callback = (response) => {
const {success, error_msg, imp_uid, merchant_uid, pay_method, paid_amount, status} = response;
if (success) {
alert('결제 성공');
} else {
alert(`결제 실패 : ${error_msg}`);
}
}
return (
<>
<button onClick={onClickPayment}>결제하기</button>
</>
);
}
export default Payment;
예전에 나이스페이 할 때는 집파일로 받아서 했는데 그게 더 힘들었던거같다.
이거는 아직 서버단 구현을 아직 하지 않았지만 쨋든 사이트에서 저렇게 설명서가 좀 잘 나와있어서 편한거같다.
리액트 많이 본건아니지만 조금 보면서 느낀건 예전에 자바스크립트 거의 7천줄? 정도 짠적있었는데 확실히 리액트가 유지보수하기에 좋겠구나 생각이든다.
리액트 문법을 제외하고는 자바스크립트 기본기만 있으면 그래도 더 좋은코드로 짜는건 몰라도 구현하는데 문제는 없는듯하다.
반응형
'react' 카테고리의 다른 글
| [React] checkBox array 추가,변경,삭제 (0) | 2022.10.13 |
|---|---|
| [React] 랜덤코드 생성 (0) | 2022.10.07 |
| [React] option checked,selected (0) | 2022.10.06 |
| [React] onClick,onChange 매개변수여러개 (0) | 2022.10.05 |
| react bootstrap (0) | 2022.05.10 |
댓글