반응형
java 11 or 1.8
node 16
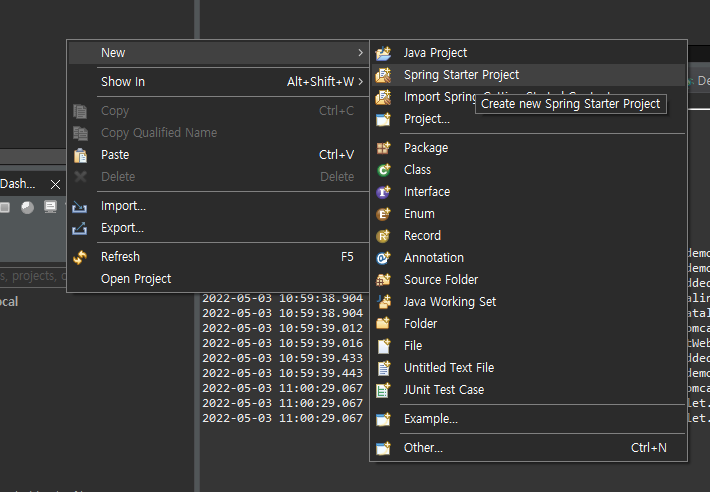
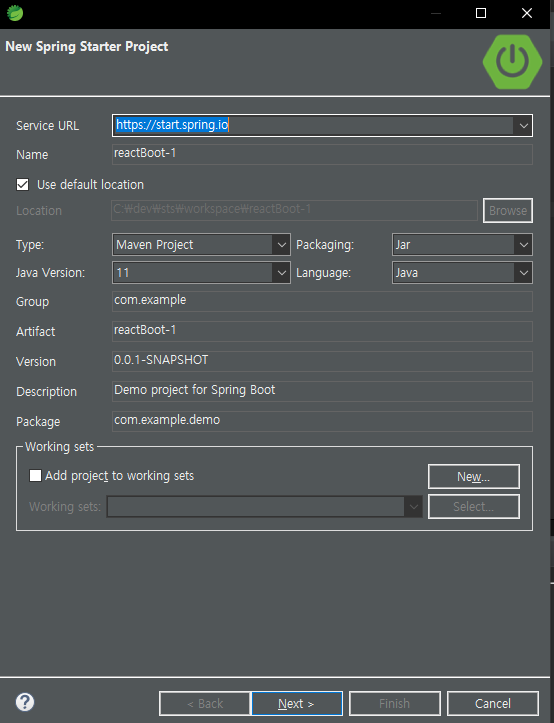
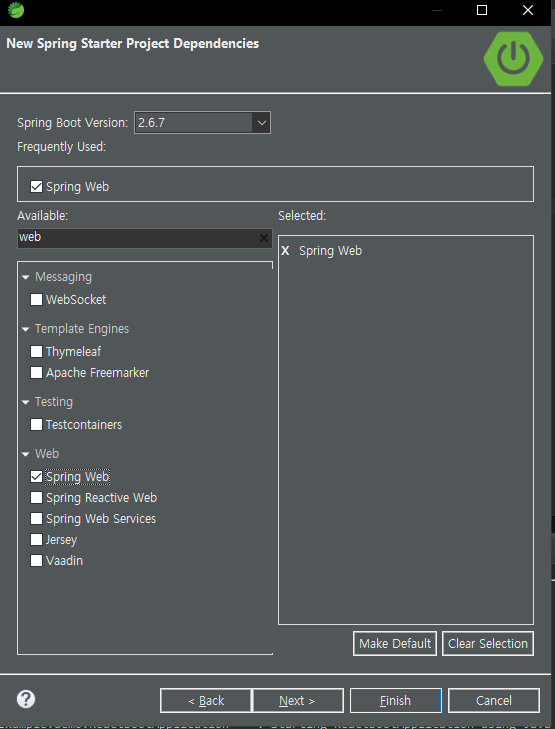
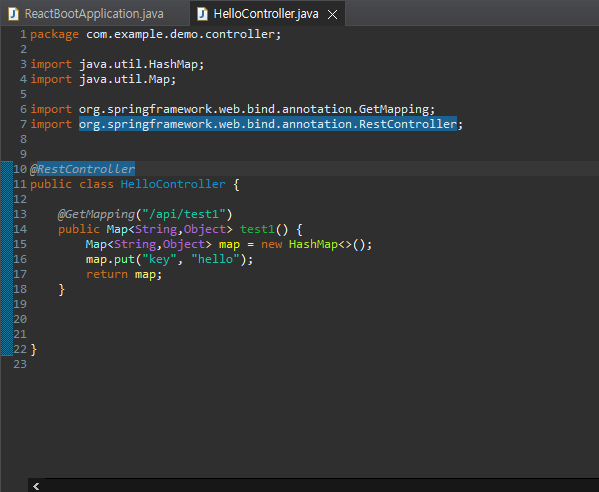
window- 1. springBoot project 생성
- 2. reactProject 생성
//react project 생성
npx create-react-app test

//프로젝트로 이동
cd test

//프로젝트 실행
npm start

//프록시 설정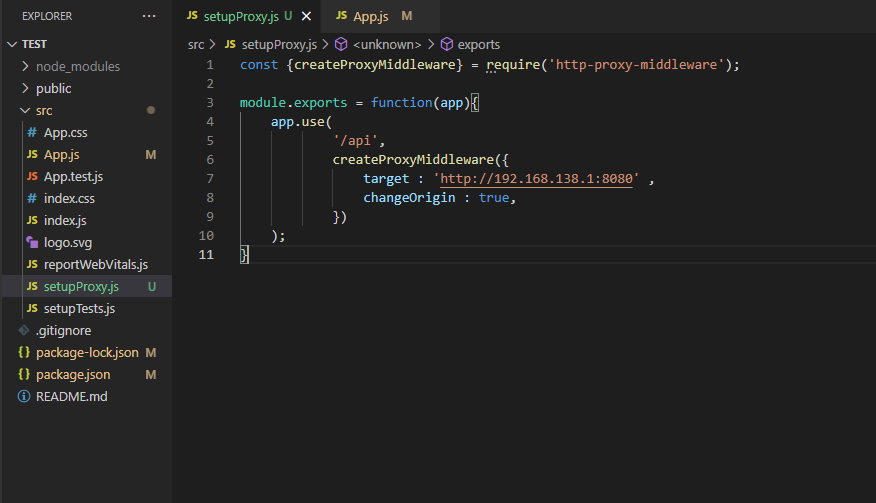
npm install http-proxy-middleware --save- 2-1 setUpProxy.js 생성
- 2-2 app.js 수정
import React, { useState } from 'react';
import logo from './logo.svg';

import './App.css';

function App() {
  // 요청받은 정보를 담아줄 변수 선언
  // [상태값,세터함수] = useState(초기값)
  const [testStr ,setTestStr] = useState('');

  //변수 초기화
  function callback(str){
    setTestStr(str);
  }

  fetch("/api/test1")
  .then((response) => response.json())
  .then((data) => callback(data.key));

  return (
    <div className="App">
      <header className="App-header">
        <img src={logo} className="App-logo" alt="logo" />
        <p>
          Edit <code>src/App.js</code> and save to reload.
        </p>
        <a
          className="App-link"
          href="https://reactjs.org"
          target="_blank"
          rel="noopener noreferrer"
        >
          Learn React
        </a>
        <br></br>
        api/test === {testStr}
      </header>
    </div>
  );
}

export default App;
반응형
'springBoot' 카테고리의 다른 글
| [SpringBoot] @requestBody list 혹은 array 받기 (0) | 2022.10.06 |
|---|---|
| springBoot email 전송 (구글 앱비밀번호 발급) (0) | 2022.09.14 |
| [Spring Boot] Spring Security + JWT token 로그인 (0) | 2022.09.06 |
| [ SpringBoot ] api test , jpa test 코드 (0) | 2022.08.19 |
| 스프링 서버 경로 구하기 (0) | 2022.06.15 |

댓글